From the
University of California Division of Agriculture and Natural Resources
by the Sonoma County Master Gardeners
Drip Irrigation
-- Intermediate

Drip
irrigation systems, when utilized with current-state automatic controls
and electric valves, represent the optimum in watering efficiency and
water-use minimization. Such irrigation systems are generally not
overly complicated, but do have some differences from overhead
irrigation that must be grasped.
Drip system
design
Drip
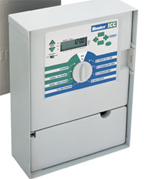
irrigation systems consist of electronic controllers, which control
several zones of electric valves to which main distribution lines are
attached, and from which one-quarter inch feeder tubes emanate, each
ended in a water emitter. More recently, emitter line, which contains
integral emitters at various spacings, often replaces feeder tube and
individual emitters in drip design. Each automatic electric valve runs
one main line, potentially with sub-mains depending on the size of the
garden zone and number of plants. Each valve or zone is run by one
station on the automatic controller—which can contain from
four
to dozens of stations—and can be programmed to run for
different
amounts of times on different days. There are variations on these basic
designs using different fittings and parts.
The design of
the system involves laying out the zones or garden beds, determining
the amount and frequency of water needed for each zone, devising a drip
layout for each zone, and designing a watering program to match those
water needs.
Hydrozoning
Each
of the emitters in one zone is always on when its station is on, and
never otherwise. Therefore if you have both plants that need frequent
watering and infrequent watering on the same valve/station, things
don't work very well--something is not going to get what it needs. Drip
irrigation design criteria number one is to plan your garden with
plants grouped by water needs. In other words, low-water plants with
other low water plants, high-water plants with their like, and so
forth. This practice is known as hydrozoning. This makes sense anyway
if you think about it, as each section's plants are also somewhat
likely to have similar sun/shade, and drainage requirements. The number
of zones you need will depend on the overall size of the garden, the
different exposures and microclimates therein and your plant selection.
Maximum zone
sizes
Mainline
runs of ½ in. tubing should generally be limited to about 200 feet in
a single zone—shorter if you have abnormally low water
pressure
(under about 20-25 psi). You want to make sure that one zone and valve
are not being asked to drive too many emitters, which would cause
inadequate water to get to the plants in the zone.
To check
this, you must first find the maximum flow rate your plumbing can
provide. To evaluate available flow rate per zone at your house, run
water full force from an outside faucet and note the number of seconds
it takes to fill a known-size bucket. Calculate the gallons of flow per
hour (gph) by determining how long it takes to fill that bucket, then
calculate the gallons per hour. If a two-gallon bucket fills in one
minute, then the flow rate is 2 gallons per minute, or 120 per hour. If
it fills in 30 seconds, then the flow rate is 4 gallons per minute or
240 gph. The maximum useable flow is considered to be 75 percent of the
flow rate, or in this last example, drip components aggregating 180 gph
(75% x 240 gph) could be spread over the mainline for any given zone.
To
determine how much water flow any zone will need, add the flow rate of
all emitters, emitter tubing and components used in a zone to make sure
you have not exceeded the maximum flow for the zone. For example, fifty
1 gph and twenty-five 2 gph emitters require 100 gallons of flow per
hour (50 x 1 + 25 x 2 = 100 gph).
Emitter
Placement

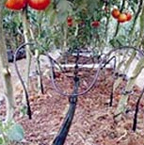
vegetables dripped
Emitters
come in specific flow rates--typically ½, 1, or 2 gallons per hour
(gph), and are either pressure-compensating or non
pressure-compensating. So the number of emitters per plant, and the
length of the watering cycle will determine the amount of water
delivered. Pressure-compensating emitters provide the same flow over a
wide pressure range. Diaphragm and turbulent flow and diaphragm
emitters are non-plugging, and hence greatly minimize annual
maintenance. (Micro-bubblers used in lieu of emitters have the same
advantage--they emit higher flows of water in a circular pattern and
can be adjusted from 0-10 or more gph.) Emitter tubing is useful for
many installations. Non-clogging emitters are built into the emitter
line at spacing of 6, 12, 18 or 24 inches. The in-line emitters are
self-flushing and clog resistant as long as system water is clean or
filtration is used. The tubing comes in ½ inch diameter, and
¼ inch. The half-inch is useful where not too many tight
turns
and twists are needed in the layout. For example a bed of larger
shrubs, or an area that can be laid out in a linear grid.
It’s a
bit more expensive, but is less likely to be moved by deer or other
animals. The quarter-inch is useful in closer quarters, where more
plants are more closely spaced. It’s also easier to work with.
Emitters
must be properly placed—not too far apart or too few in
number—or root development may be restricted by the limited
soil
area wetted. Emitter placement is also dictated by soil type: sand,
loam or clay. To compensate for variations in lateral movement of water
in the soil, generally emitters should be spaced closer together in
sand, and further apart in clay. A rule of thumb is 6 inches apart in
sand, 12 inches apart in loam, and 18 inches apart in clay. If one to
two emitters are recommended for a plant in a clay soil, two or three
may be required in a sandy soil to wet a sufficiently wide area. The
same thinking applies to emitter tubing. Use more widely spaced tubing
in clay, and more closely spaced in sand.
Single emitters
are fine for small new plants, but planning for growth dictates using
multiple emitters spaced evenly around the plant, typically at least
two, or three if a shrub that will grow considerably. Alternatively,
use a circle of emitter line with 3-4 emitters in it. Trees may require
two to three concentric circles, depending on the size of their roots.
Calculating
Watering Cycles
The
biggest challenge in drip irrigation is accurately determining how much
and when to water. Putting just the right amount, and not too much or
little on the plants irrigated based on plant type, soil type, exposure
and local weather conditions is important to irrigating effectively and
efficiently. There has been endless advice in gardening articles over
the years to 'check the soil moisture' in order to determine irrigation
timing. But that advice ranges from 'poke a rod into the ground--if it
goes in easily, it's probably moist' to 'dig a small hole several
inches deep and check the soil moisture'. The former probably works
sometimes, but certainly doesn't seem reliable. The latter is a lot of
work if you have hundreds of plants. In response to this question on
drip irrigation timing, an experienced master gardener recently stated
"I believe in the get-in-there-and-feel it system - stick your fingers
in the soil and see how moist it is. I also try to gauge the plant's
water needs by looking at it - when it just starts to show water-stress
you know it's time."
Sound enough advice, but some
people’s life and gardening styles don't lend themselves to
tending to each and every one of hundreds of plants, and their
surrounding soil, one-by-one. They need a system that reliably
determines how long and how often to have the drip on for each planting
area.
Fortunately, there IS a system that accomplishes this.
It assumes you have a controller-driven automatic drip system and that
you have hydro-zoned your plants, as discussed above. The document Calculating
Drip Irrigation Schedules
contains the information. There is math, and some of this may seem
daunting at first, but a couple of examples will get you comfortable.
Irrigation
Controller

There
are several key factors to consider when selecting a controller. As a
general rule, better, more durable controllers with more features will
be more expensive, but in the long run are good value as they allow the
most flexibility in controlling the irrigation of the landscape for
efficient watering. In addition to having enough stations for the
number of zones you need, the controller should have features that
provide for:
Multiple independent programs
At least two start times per program
Station run times in minutes from one to 120 minutes
Odd/even, weekly and interval program capability up to 30 days
Seasonal adjustment, or percentage override from 0-200%, to allow for
seasonal variations without re-programming
“Off”, “Auto”, and “
Manual” (both all and single station) operation modes
Non-volatile memory or battery back-up
Rain shut-off (preferable with connection for a rain sensor)
More
advanced features such as rain sensors, ground water sensor connections
and evapotranspiration (ET) modules to factor in site climatic
conditions are increasingly available, and are starting to be within
the range of a home landscape irrigation system.
A very
important but hard-to-grasp issue is ease of programming. Programming
methods vary widely by manufacturers, and range from straightforward
and logical, to idiotic and impossible to remember. It’s a
good
idea to spend a bit of time with a sales associate at the store where
you buy irrigation equipment to understand the ease of programming of
any particular unit; or to spend time online looking at the
instructions for a potential purchase.
See
Installation
and Maintenance of Drip Irrigation Systems for
what to do once you’ve decided to go ahead with a drip system
installation.
Back
to
Drip
Irrigation Page
|
© Sonoma County Master Gardeners
|


