Belgian Fence
 |
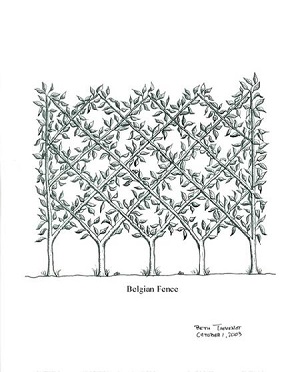
Fig. 1
Belgian fence illustration by Beth Thevenot  |
A
Belgian fence is a style of espalier in which limbs are trained into a
lattice-like pattern. Identical varieties of fruit can be used or even
a mix of cultivars, i.e. the annona family.
Select trees or whips
with ½" to ¾" caliper trunks and set them against guy wires or hogwire
attached to a frame to support the trees while training them into
place. The best time to start an espalier is several weeks before the
tree breaks dormancy in late winter or early spring because the plant
will have a more vigorous response to the pruning cuts made after
planting. The technique can also be done in cooler fall temperatures.
A full-fledged fence can be developed in three to four seasons. Whether
6 ft. long or 60 ft. long, the process will be similar.
Materials (for a six foot Belgian fence): 6 trees of ½" to ¾" caliper, preferably grown on dwarf or semi-dwarf stock
Two 4" x 4" cedar posts
Eight feet of hogwire or other agricultural fencing Tools: Hammer
Table saw with Dado Blade
Electric drill
Nails and screws
Blue plastic tape
Gridded paper
Pencil
Directions
1. Select a site where trees will receive a full day's sun. Amend soil as needed.
2. If using hogwire/fencing, use table saw and dado blade to cut notch
lengthwise on the posts, centered on the interior sides of the post.
3. To make freestanding fence, erect support grid of posts and wire.
Field fencing or hog wire can be set between posts set into gravel 8
feet apart. After installing posts, set hogwire into dado and screw
into place with stainless steel screws. Guide wires can also be used
with turnbuckles if preferred. The grid of hogwire helps to map out the
design.
Trees
can also be trained on an already existing fence, although unless it is
chain link, attach turnbuckles to extend eight inches out from fence to
provide air circulation for trees.
4. Draw out design on gridded paper. The traditional design of Belgian
fences involves trees planted 18 inches on center with a pattern of
branches angling off at 45 degree angle from the base of the trunks
about 16 inches from the ground. The ending trees of the fence will
have one branch angled at 45 degrees towards the rest of Belgian fence
with the other branch being trained perpendicular to ground. Pattern
should resemble an argyle sweater with lines coming down from the base
of the bottom of diamonds.
5.
Using plastic tape, set out design on hogwire or fence, starting with
first tree one foot in from cedar post and ending one foot before other
post with final tree. Set trees in place and plant trees, ideally
setting trees in so dormant buds are at point where tape steps off from
90 degrees to the first 45 degree angle. Water in plants.
6. Look
at buds on tree to decide where to cut. Look for outward facing buds
that are already pointing in the right direction at or slightly above
spot where pattern on fence angles off. Cut each tree with sharp
pruning shears above chosen buds. This will trigger tree to restart or
branch at desired place. Never cut below first six inches of main stem
as most trees are grafted and the tree won't come true to its variety
of cut below bottom bud union or graft.
7. Tie main stem to support fence. In about three to four weeks, buds
will grow on. Point new stems in desired direction of pattern and tie
them on the support when they are about six inches long. End pieces
will have one piece going up at 90 degrees and the other stem at 45
degrees. Interior trees will have each branch trained up at 45 degrees
in each direction. Continue to tie in stems as they grow on along tape
lines.
8.
Belgian fence will be mature in three years or so. During that time,
remove any undesired shoots that come off main pattern to nearest bud.
This will also encourage fruiting.

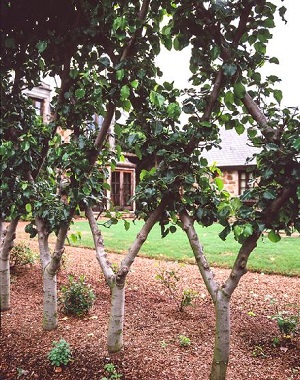
Fig. 2 Belgian fence close-up 

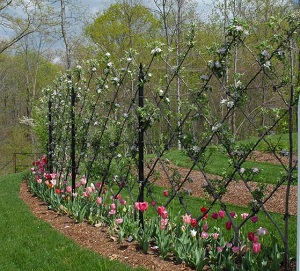
Fig. 3 Circular Belgian fence 

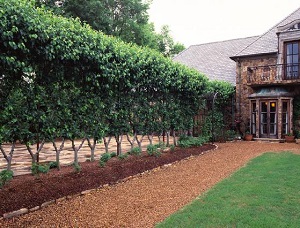
Fig. 4 Belgian fence 
Back to
Espalier Page
Espalier Design Page
|


